Friday, 12 July 2013

Thursday's challenge

Matt, my husband, had requested no more cake until August 10th. I was a bit disappointed but was happy enough to encourage him in a mini-health kick; it would just have to be inventive salads for a few weeks. But I was thrilled when my friend Katie requested a bake to celebrate her birthday.

Katie doesn't live close to me, but a happy coincidence meant that I would have the chance to see her just a couple of days after her birthday. The challenges of this bake were:
  1. Katie had requested something chocolaty (not very restrictive) 
  2. I would have transport the bake on a 4 hour, 2 change train trip across south west England (more restrictive) 
  3. I left myself with limited time to make the bake due to a late finish at work and lots to do the night before the aforementioned train trip (not as restrictive as it should have been).


I decided that brownies would be the thing. The chocolate criteria would definitely be met plus they are not delicate and don't require icing so would be ok for the transport restrictions. I wasn't sure about the time thing. The brownies I usually make are gluten free, require significant separation of eggs and are not that quick. I wanted to try something different, probably with white chocolate. I felt reasonably confident that I could find something suitable. I also had it in mind that I wanted to use cranberries, in the belief that I had a pack at the back of the baking cupboard.

I found a few recipes for white chocolate brownies (I think the trendy name for these is blondies) and chose the one that looked both easiest and most adaptable for my requirements.

I made a start and swiftly realised that I had less than 50g of the 400g of white chocolate that I needed. On further inspection the main bake only required 300g; the rest was for chocolate chunks. Fortunately Matt was keen for a break from his DIY so took a walk to the local shop to get some white chocolate while I made a start on the tea.

The first phase was to melt the (300g) chocolate with 75g of butter. I was a bit worried about this because the only proper butter we had was the stuff that smelt like cheese, but I tasted a little bit that was left on the knife that I had portioned it with and it didn't taste at all cheesy. Very weird.

Once this has melted the recipe states that you should allow it to cool and then mix in the eggs (3, which was lucky as that's all we had) and sugar (90g) and vanilla. But I didn't fancy my chances of mixing in the bowl that I had melted. So instead I pre-whisked the eggs, sugar and vanilla and then whisked the butter / sugar into this. I wasn't really sure if I should have whisked or mixed with a spoon but whisking seems more efficient.
Next I added 200g plain flour. Since I already had the whisk out I thought I may as well whisk this in too. Finally it was time to add the chocolates chunks and cranberries. I decided to use plain chocolate here. And what I thought was a bag of cranberries was actually a mixed bag of raisins, sultanas and cranberries, but this wouldn't really matter. I laid off the whisk for these final additions and stirred gently instead.

The recipe said to pour the mixture into a lined baking tray. As time goes by I am becoming less and less convinced about lining baking trays so I just greased it thoroughly and hoped for the best.

A significant challenge with brownies is that you can't use the skewer test to see if they're cooked as they're supposed to be a bit gooey in the middle. The recipe said to bake for 20 minutes, but obviously every oven is different. I think mine were in for a bit longer than this, just until the top looked a little bit cracked.

It would have to wait until the morning to be chopped and removed / chiselled out of the tray, I still had my packing to do and it was only 10 minutes until bedtime.

Fortunately the copious greasing was satisfactory and the brownies packed beautifully into a tin ready for transportation (with one little bit left for Matt - his health kick isn't that extreme!). 

And they made the journey ok. It was lovely to see Katie, and I think she and her baby girl both enjoyed the brownies (although the baby did seem determined to put the whole lot on the floor). A few crumbs were dropped on the ground which were dealt with by my mother-in-law's Yorkshire Terrier - I just hope it doesn't poison him as I think that both chocolate and dried fruit are bad for dogs. I suppose if it does poison him there are worse ways to go.


Tuesday, 9 July 2013

Saturday's alternative cake

Not being quite sure how many people to expect to Matt, my husband's, birthday luncheon and knowing to expect two under 7 year olds I deceided to make another sponge to augment the black forest gateau. Time now pressing on I decided to go for the simplest sponge going. This is very pleasing mathematically:

For every egg you use:

  • 50g of butter / butter substitute 
  • 50g sugar
  • 50g self raising flour

It is also very pleasing in terms of simplicity. You just put it all in a bowl together mix it up a bit with a spoon and then whisk it all together with the electric beaters (you only have to mix it up a bit with a spoon first if you don't want the ingredients to fly everywhere, you can omit that step if you don't mind a lot of splattering). I started off with 3 eggs (and 150g of everything else) but once this was whisked decided that it would insufficient for 12 fairy cakes and 1 round sponge so added another egg (and another 50g of everything else). I also added a few drops of vanilla extract (this protects against it tasting too eggy) and a splash of milk to loosen everything up.

Then I spooned it into my cases. I was particularly excited to be making fairy cakes as I'd got some rather attractive new fairy cake cases (I chose to use red stripy ones today). It cooks at 180˚C until golden brown, confirmed by skewer test. The time depends on the size of the cake so the fairy cakes took about 20 minutes and the larger sponge about 25.

I was not about to go doing anything fancy with these cakes - I had had enough of that with the gateau and I thought I should leave them fairly simple for people with more of a delicate pallet. I cut the big round cake in half and sandwiched it together with cherry jam. This would go with the spare chocolate cake that I had sandwiched together with chocolate hazelnut spread to create the effect of one whole cake.

I intended to make butterfly cakes with the small ones, but instead of using butter icing I would use lemon curd. Unfortunately when I came to deploy the lemon curd I found that there was considerably less left than when I last opened the jar. So instead I used various preserves that I found in the fridge and made 3 of each of:

  • lemon curd
  • loganberry jam
  • cranberry and orange jam
  • gooseberry jam

(all preserves courtesy of my mum)

I constructed a cake stand (doilies and all) and we were good to go.
Jammy butterfly cake
An array of cakes


I must say that this good basic sponge was much more to my taste than the gateau - much less rich but equally (in my opinion) delicious - helped almost certainly by the vanilla extract which meant that it didn't taste eggy at all.

Monday, 8 July 2013

Saturday's gateau

After a modicum of deliberation Matt, my husband, decided that the cake that he would like to celebrate his birthday was a black forest gateau. This would mean that the cherries preserved in kirsch could finally be deployed, although candles would prove tricky.

I didn't underestimate the difficulty / time rating of this so Matt went out to do the shopping for his birthday luncheon while I stayed at home to do the baking. If this turned out to be less taxing than I suspected it could always be interspersed with gardening (hopefully), other aspects of food preparation(ok), or household chores (although not if I could avoid it).

I searched my recipe books and cuttings for suitable recipes. There were only two and one of them required me to sieve butter which seemed ridiculous so I went with the other one. I could tell that this was going to be a recipe that created extreme amounts of washing up. But still, it was a special occasion. And we do have a dishwasher.

To start with you have to melt some butter (I used butter substitute as I didn't want to risk the butter that smelt like cheese on such a critical bake) with sugar, chocolate and coffee. The recipe stated 200g of plain chocolate. I used a whole 150g bar and half a 100g bar. Yet the scales told me that this was 216g. So either the scales were wrong or the chocolate was wrong. I decided to give the chocolate the benefit of the doubt (I might revert to analogue scales once I've conducted a few experiments to see if the digital ones really are dubious) as 16g too much chocolate was likely to be less detrimental than 16g too little.

Then you have to wait until this is cool before adding the rest of the ingredients. This gave me time to do something that I don't usually bother with - sifting. Maybe I had sifting on the mind after I'd declined to sieve butter. For the first time in my life (I think) I did a recipe that used both plain and self-raising flour and it seemed to me important that they were properly mixed (along with the cocoa powder).

The chocolate mixture still didn't seem very cool to me so I had a pause in baking and potted up some tomato plants. I just love the smell of tomato plants.

Mixing the gateau
On returning to the kitchen I whisked the sifted ingredients into the (now cooled) chocolate mixture. It was a good job I had an apron on as it splashed all over the place. And then you whisk 2 eggs in - I suppose the reason you have to let the chocolate mixture cool is so that you don't scramble the eggs.


The recipe indicated that you should pour the mixture into a large tin to bake, and that you then slice it up for your layers. But I am useless at slicing (as evidenced by the frequent mess I make of slicing up bread) and decided that the safer course of action would be to bake the layers separately. I dug around in the tin cupboard and found three the same size and ladled three ladles into each. There was still some mixture left over so I got another tin out (slightly smaller) and poured that in to make a potential 4th layer.
Oven mess
One of the pitfalls of this type of runny cake mixture is that it leaks through the bottom of loose bottomed tins. So I got a bit of chocolatey mess on the worktop (not really a problem) but some also dripped onto the bottom of the oven - I am unlikely to be able to delay the cleaning of the oven for much longer.


The benefit of baking in smaller tins was that it would take less time (I am an impatient cook), the disadvantage was that I had no long how long it would take. So I had to stay close to the oven and this meant that really I had to do some household chores. After about an hour the cakes started to smell cooked and the skewer test confirmed this to be the case. I whisked up a tub of cream but was wise enough not to do any gateau assembly until it had completely cooled. In the meantime I chopped up some veggies to have raw. We needed some healthy food of some sort. 

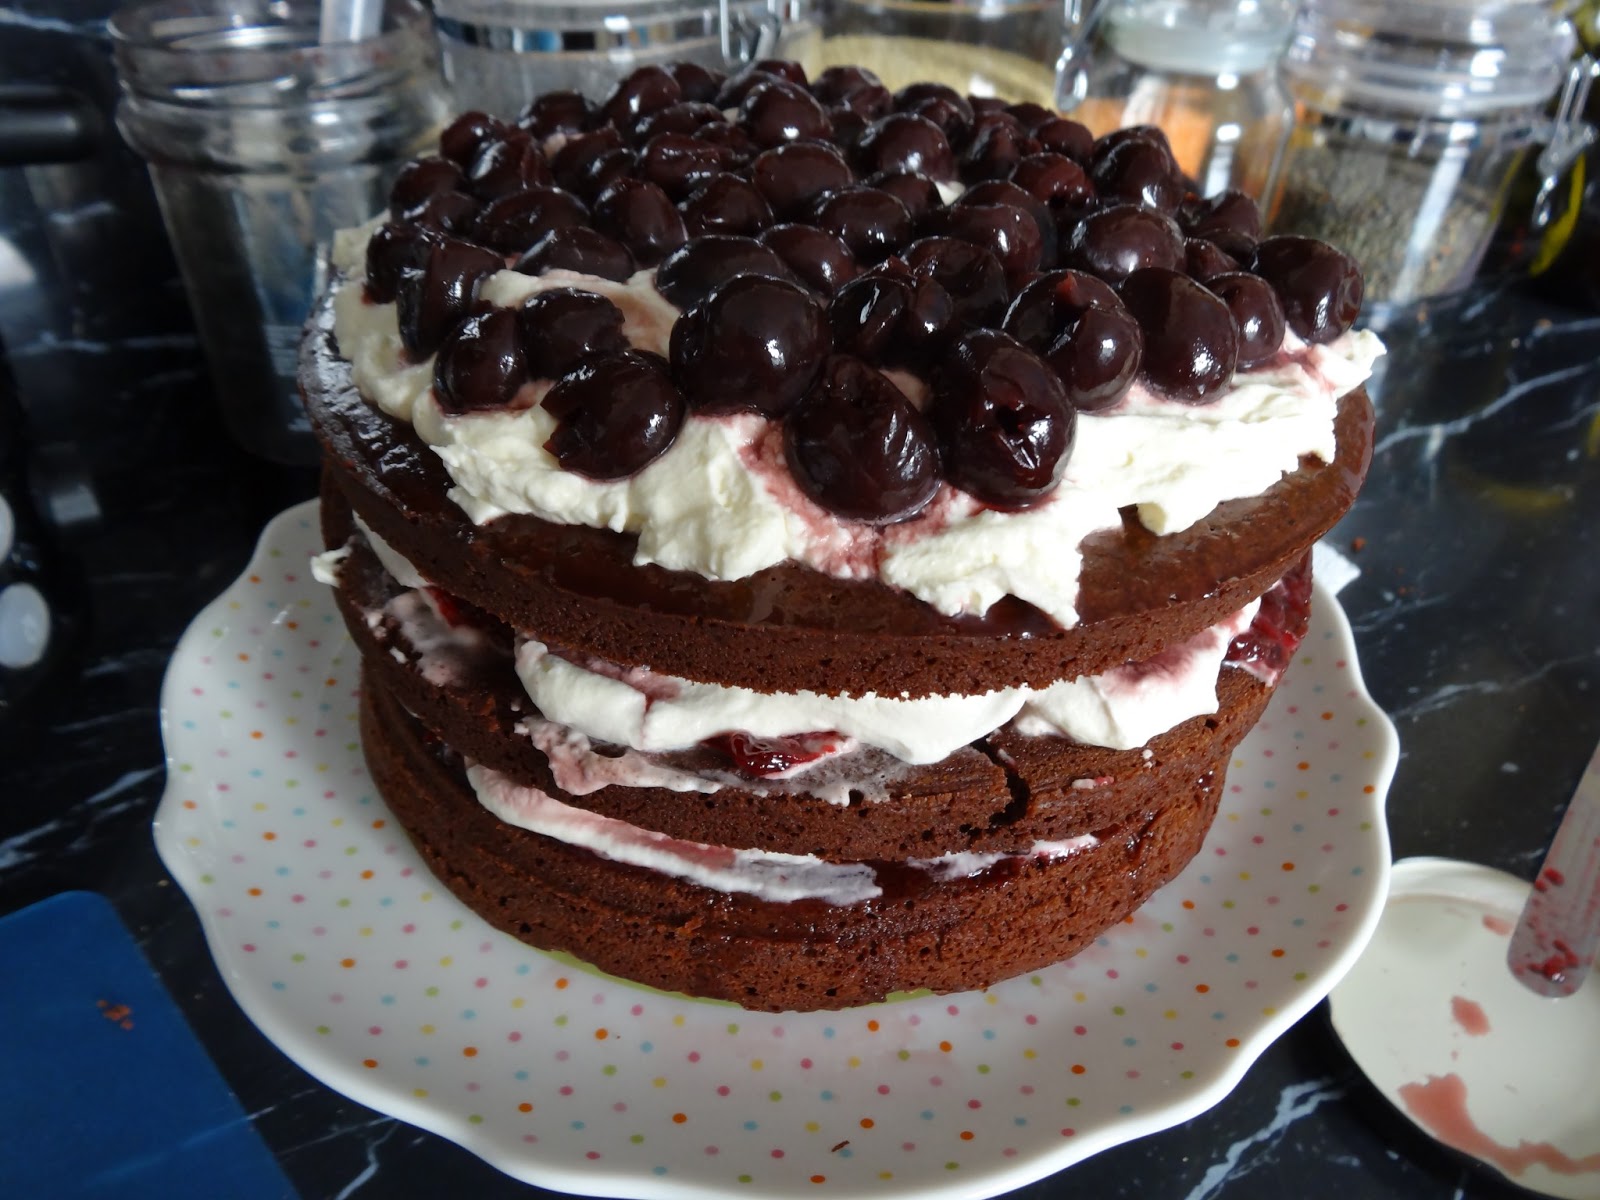
I had no intention of following the recipe for the filling / stacking, which required me use normal jarred cherries and to thicken the juice with arrowroot. Instead I planned to use a combination of the kirsch, followed by cherry jam (of which, after my first application of kirsch, I discovered we had none - fortunately Matt was still at the shops so I was able to direct him to a suitable product), followed by cream, followed by the cherries themselves. My rationale was that the kirsch would flavour the sponge, the jam would make the cream stick to the sponge and the cherries could then be nestled into the cream. 3 layers looked precarious enough so I didn't risk the 4th. Instead I would fashion this into something for the youngsters we were expecting. 

One layer
3 layers


We all had to wait a while before trying out the completed gateau. I was successful in persuading the youngsters that they wouldn't like it and they seemed to be quite happy with their chocolate hazelnut spread filled sponges. As predicted candles were off but we did all sing 'happy birthday', accompanied by the musical cake slice. Between six grown-ups we devoured half the gateau - some people with considerably larger portions than others. I had a small to moderate sized piece and was overwhelmed by it. So rich, so boozy and so delicious but I wouldn't have managed it it if hadn't have been for the nice pot of tea that we had with it. Being full of fresh cream I wasn't optimistic for the gateau's survival beyond another 24 hours at most. Fortunately our guests were only too keen to take home a party bag.

Half down, half to go
Where to start?

Sunday, 7 July 2013

Friday's team pizza

As is becoming somewhat of a tradition on a Friday night we were going to have pizza. It was Matt, my husband's, birthday so I had offered an array of alternatives to the usual (him making pizza) including:

  • Going out for pizza
  • Going out for something else
  • Me making the pizza
  • Me making something else

But Matt was pretty sure that he wanted to do the pizza and I wasn't going to argue too strongly (he makes a delicious pizza). So the ingredients for the dough went into the bread maker. I don't know the details of these ingredients - the bread maker being well and truly Matt's domain. Whilst that was whirling the plan was that we'd take a walk in the evening sunshine to our 3rd most convenient convenience store to top up on toppings. That plan was thwarted slightly because we became enthralled with a tennis semi-final. We finally made it to the shop once the dough was ready and we realised that we should use the pause function on the TV otherwise we would not be enjoying any of the late evening sunshine. And as it was getting late Matt decided that I'd better be his sous chef.

Almost anything else for the pizza could be improvised but clearly cheese is important. We had chosen this 3rd most convenient convenience store because it is the best source of grated mozzarella. After selecting a few mushrooms and some spinach we got to the cheese section. There was grated mature cheese; but no mozzarella. A shop person just happened to be going by at the point at which I was incredulously examining the cheese shelves. Upon questioning he told me that they no longer stock mozzarella. I muttered a few words of incredulity at him, but had to accept that there would be no mozzarella this evening. Never mind, it would just be a new type of pizza experience.

My main (or possibly only) role as sous chef was the preparation of the toppings - this involving chopping it is well and truly my domain. The dough recipe that Matt uses makes enough for two pizzas. He wanted one as a Greek and one as a multi-veggie. So for the Greek I pre-cooked the spinach (4 minutes on medium in the microwave) and chopped up some feta and tomatoes. To this Matt also added some pine nuts and black olives. The tomato sauce was half a jar of chilli pasta sauce that we had left over (worryingly I can't recall from when). For the multi-veggie I had more chopping. As well as the mushrooms I chopped up some green pepper. This is notorious for not cooking quickly enough on pizza so I pre-fried it in the little fried egg pan. There was some sweetcorn leftover from the previous night's jacket potatoes so that would go on too. As for the cheese (we may not have had any mozzarella but there was plenty of other choice) we went for a combination of goat's cheese and garlic and herb soft cheese. These should have been straightforward to prepare, but in doing so I managed to break a knife. It was from the notorious range of bubble cutlery which I frequently have bad fortune with. The tomato sauce was half a jar of basil pasta sauce, the other half of which will now most likely be forgotten in the fridge for a number of weeks.

Multi-veggie pizza mid topping addition
The demise of a bubble knife

The pizzas bake at the hottest the oven goes until the toppings looked cooked. This is very imprecise but the base always seems to come out ok too. I suppose you are basically baking bread. We were very restrained and had just a slice of each each - plus a load of hummous, the crusts are ideal for dipping. The mozzarella-less pizzas were a revelation - even to a cheese lover such as myself. We'll just have to see if they pass the cold pizza test at Matt's birthday luncheon.


Friday, 5 July 2013

Thursday's birthday baking

In keeping with tradition, Matt, my husband, planned to take some high energy feed to his workmates to help celebrate his birthday. This plan mostly involved me constructing said high energy feed. Matt's requests were for paradise slice and oatcake and being the good wife that I am, after a short effort to try to persuade him that something more cakey might be nice I acquiesced and set to on these two tray bakes. 

The oatcake is a recipe of my mum's. It's not the healthy sort of oatcake on which you might apply cheese, rather it consists of equal parts of sugar / syrup, butter / butter substitute, plain flour and oats. I used 150g of each. The sugar / syrup combination I selected was 100g golden caster sugar and 50g golden syrup. It also works with any other type of sugar and any other type of syrup (e.g. black treacle or molasses if you want to add a tiny bit of nutrition) in any proportions. 

1. Melt the butter / butter substitute and the sugar / syrup together over a low heat. I did this on the hob but you can do it carefully in the microwave. The microwave is my mum's preferred option but I'm not really careful enough. 
2. Stir in the flour and the oats. At this point you can add some spice or dried fruit or anything else you fancy. I wanted to keep it fairly simple today (the paradise slice would be the thing for Matt's more gastronomically adventurous colleagues) so added just a little mixed spice (not to be confused with allspice). I would have added cinnamon but shockingly I could not locate any in the kitchen.
3. Press it into a tin. I lined it on this occasion but really, if it's a non-stick tin you probably don't need to.
4. Bake at 180˚C for about half an hour. 
 
The basic oatcake
That would usually do but since this was a celebration I decided to top it with some chocolate. 

5. Melt some chocolate (I used a 150g bar of milk chocolate) using whatever method works for you. The only method I have ever found that works for me is over a pan of boiling water. I added a little bit of butter because I've seen them do this on the television
6. Spread the melted chocolate over the oatcake.
 
Chocolate covering
And maybe I could have stopped there but this was a celebration so I decided to finish off with some sprinkles. Matt was keep to apply these and since I am generally quite clumsy with the application of decoration I let him take charge of the pot of coloured sugar strands (it was his birthday after all).
 
Adding the finishing touches
I made the paradise slice while the oatcake was baking. This was basically a reprise of what I made a few weeks ago as sustenance for a team building event. I did the old classic of not having the butter soft enough before creaming it with the sugar and duly made a terrific mess all over the work surface. But most of it stayed in the bowl.  I was a bit worried as a did this bit as it smelt of cheese (I love cheese but this was out of context). It is possible that the butter was a little past its best before but it had been unopened in our very cold fridge. So I tasted just a little bit (it tasted more of butter/sugar than cheese) and carried on.
 
The paradise mix
We resisted the temptation to test the creations last night and sliced them up for transportation to Matt's work this morning. We saved the slightly dud bits for ourselves (the bit of the oatcake where the greaseproof paper didn't come off properly and the disintegrated bit of the paradise slice).

Ready for feeding
The bits that I might get to eat


The feedback from the engineering gannets (as Matt refers to his workmates on occasions such as this) was good. Apparently the lack of cinnamon wasn't noticed in the oatcake. And apparently the other was "truly a slice of paradise" (someone genuinely said this!).

So all that remains now is to make the birthday cake proper. 


Tuesday, 2 July 2013

Wednesday's boozy mushrooms

I got excited when I got a text from Matt, my husband, the other day asking me what I'd like for dinner. The reason that this is exciting is that when he cooks it often involves cheese and I was in the mood for cheese. Nonetheless I responded suggesting potato (jacket) or pasta as we needed to be pretty swift about getting out of the house.

So I was surprised when I got home to be greeted not by the smell of cooking, but by the smell of burning timber. Apparently Matt had only asked my dinner preferences in case he needed to buy anything, by the time I replied it was too late, and he had busied himself with the skirting board project. Still, I was pleased that the skirting board project was progressing and was sure that I could concoct something for us with what we had.

It would be pasta and it would probably be mushrooms. Although there were some other possible ingredients the mushrooms looked most in need of consumption.

I had brought a 600g "family" pack of mushrooms at the supermarket a few days previously after using a little bit of algebra to calculate that this was the most economical way. I'd guesstimated that this was the case but felt the need to do the maths as usually it's better to buy things loose.

How these got named a "family" pack defeats me. An important lesson in mushroom cuisine is that that they cook down to hardly anything so this 600g would serve just Matt and me (and only for one meal). They were clearly not a family themselves (being all of approximately the same size and age) and the only family I could imagine them feeding would be one that doesn't like mushrooms very much. I suppose technically you could call a married couple who occasionally borrow a dog a family, in which case the pack description is not so misleading.

Anyway, I quartered approximately half of the mushrooms and sliced the rest (I've found this to give the best consistency to the finished product).
Prepared mushrooms
I added these to some onions and celery that had been sweating (if only there was a nicer word to use there, but I suppose it does describe the process accurately), along with some of that slack pre-chopped garlic that comes in a jar preserved in vinegar (we were out of proper garlic and this is just fine). And then you can leave it until the juices have come out of the mushrooms & they have, as predicted, cooked down to a fraction of their original volume.

So I pottered about for 20 minutes or so and then added the finishing touches:

  • Some herbs from the garden - I'm pretty sure it was thyme
  • Some vegetable stock powder
  • Some tomato puree - a tip from my mum when I first started cooking with mushrooms
  • Some crème fraiche - at least that was the plan. But what I thought was a whole pot in the fridge was less than a dollop so I augmented this with some low fat cream cheese.
  • Some sherry - this wasn't the plan. I would probably have used white wine but the sherry was open.
And at the same time as the sauce was being completed I boiled the pasta. We went for the fun pasta again. There was a little less fun pasta than originally planned because I lost some in the sink in the draining process.
Sphinx passa
When it came to the eating I found a penguin and a koala in my pasta shapes, as well as a reappearance of the sphinx and some less fun shapes like apples and bows.

Penguin pasta
Koala pasta


Based on the boozy aroma coming from the pan I was a bit worried that I might have taken the finishing touches a splosh too far but it was too late to worry about that now.


 It turned out that the sherry wasn't a splosh too far. I think it turned what might have been a rather ordinary mushroom sauce into something rather more sophisticated.

 
Sherry mushroom stroganoff with fun pasta
And it was all done quickly enough that we didn't too much of our samba lesson.

Wednesday, 26 June 2013

Tuesday's cherry bumpers

The concept of cherry bumpers caused much hilarity amongst my work mates who thought that I was getting up to all sorts of shenanigans. I was in fact describing my next plan to use up some of the 2kg of bargain cherries that I had acquired. I had had a search in my likely recipe books and these seemed like a good option. There was no picture but from what I could make out they would be like little cherry pasties.

The recipe in the book called for shortcut pastry made with butter and lard. I had neither so made do with butter substitute. And I was desperate to make almondy pastry which I felt sure would be possible. My recipe books failed me so I had to make it up. My mum taught me that you can replace the flour in cake recipes with ground almonds and I saw no reason why you couldn't do the same with pastry. So my recipe was:

  • 100g ground almonds
  • 200g plain flour
  • 150g butter substitute
  1. Whirled together in the food processor until it was crumby
  2. Tipped into a bowl
  3. Brought together in a ball (I didn't need to add any water)
While the pastry chilled I prepared the cherries. The recipe stated 250g cherries, stoned. What I had no idea of was whether this weight was before or after the stoning. Since I had so many cherries I went for the post stoning option.
Prepared cherries
My stoned cherries then had to be combined with some sugar (the recipe said 2 tablespoons but I had the dregs of a kilo bag left so just used that which may have been slightly more or less), ground almonds and almond essence / extract (not really sure what the difference is and I can't recall which one the recipe called for). I didn't think that we'd have any and I had prepared myself to use vanilla instead. But whilst delving for the vanilla I happened upon some almond. This must have been left over from when Matt, my husband, made me an everything cheesecake in an effort to impress me with his culinary skills very soon after we met. So that would be about 7 year old almond extract / essence.

The recipe informed me to roll out the pastry fairly thinly. Like the with / without stone cherry problem this vague instruction left me a little befuddled. So I just rolled it out as much as it would to fit my board. Then to cut it out into 10-12cm discs. I assumed that this was diameter rather than radius (that would be a very big disc) or circumference (that would be unnecessarily complex mathematics) and used my bright pink kitchen ruler to identify a suitable bowl to use as a cutter. I made six discs (as per recipe) and had some pastry left over so maybe I rolled it a bit too thin.

I divvied up the cherries amongst the discs and kept some back for the left over pastry. When I came to seal up my first bumper I realised that I had grossly over applied the cherries. So probably the 250g is the cherry weight before stoning. This first bumper needed a bit of patching up with some of the spare pastry but I removed some cherries from the others and had more success.
Adding the cherry filling
Sealed up


I pressed the left over pastry into a mini flan dish, filled this with the left over cherries and topped it with a party heart to make a mini-tart.

They went into the oven at 200°C until looking golden (about 12 minutes I think). They smelt amazing (I wish that you could transmit smell across the interweb): a kind of fruity, almondy aroma. But I didn't indulge right away as Barbara, my mother-in-law, had come for tea and brought a rather decadent cheesecake from a luxury supermarket for pudding; I had had a not insubstantial wedge and couldn't manage anything else sweet so soon afterwards. Matt and Barbara have a stronger constitution than me so they shared one (with some spray cream) for the purposes of taste testing. The verdict was positive. I was particularly pleased as my improvised almond pastry seemed to have worked.
Six cherry bumpers
Delicious served with
some spray cream


My first taste was just before bed when Matt and I shared the mini-tart. I was pleased with the taste. Today I had a cold bumper at lunchtime and a warmed bumper (with vanilla ice-cream) as a post-dancing snack. It was best warm, and the addition of ice-cream is to be recommended.
Cherry tart
Just 2 bumpers left now: 1 each for our packed lunches tomorrow. And I will able to prove to my work mates that the cherry bumper is a perfectly valid baked item.